


Sunday, April 25, 2010
Beer-cap Magnets

Organizing the Design Clutter!

Saturday, April 24, 2010
Magazine Wreath
 I got this idea from dollar store crafts. Its a great way to use all those old magazines you have lying around. It cost me ZERO dollars! Click read more to see how to make it!
Accent Wall
I decided to paint a wall in my room... Pretty much I only painted one because I'm lazy and didn't want to move my desk..Here is the Before. Click "read more" to Check out the after!


Sunday, April 18, 2010
Summer Time, Summer Time, sum sum, Summer Time!
Weee!! It's Almost summer! And the California weather is wonderful so I decided to switch back to my "Summer Time comforter". I got a new lamp today so I had a mini room makeover.


Wednesday, April 14, 2010
No-Sew Halter Top

I got this Men’s shirt from a thrift store by my house called “Thrift Redefined” for $2.00. I love this color and i loved the pattern on it so I decided to make it into a halter top for me. Its really easy and it takes about 10 minutes.
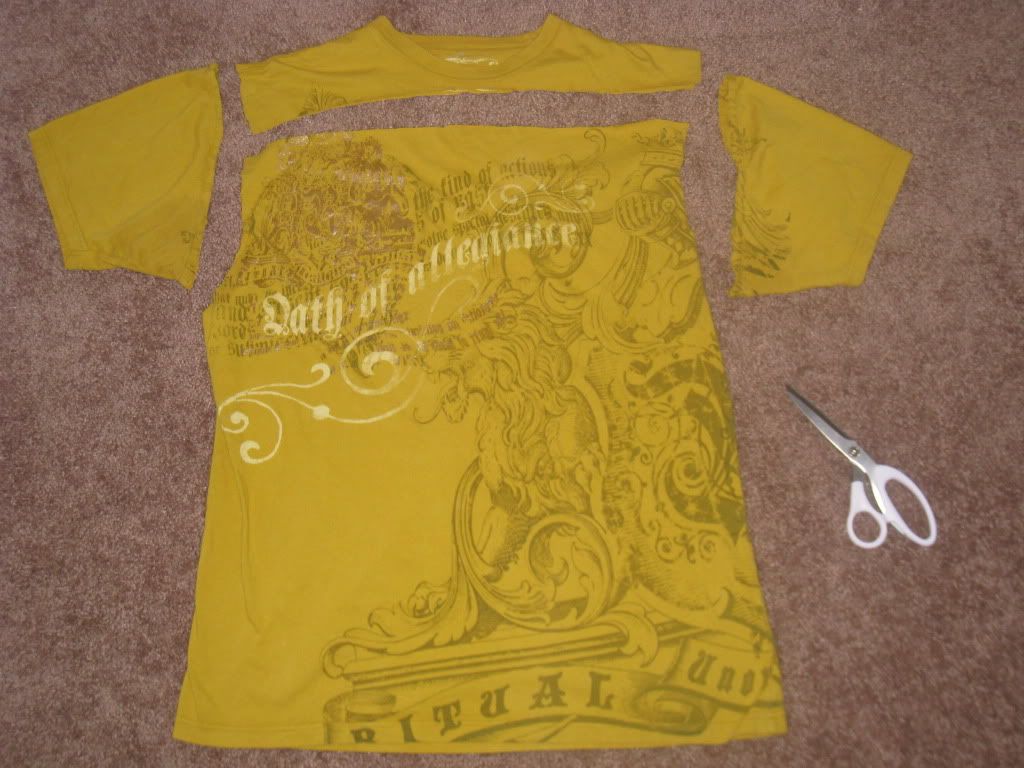
Step One: Find a men’s XL shirt and cut off the sleeves and the neck
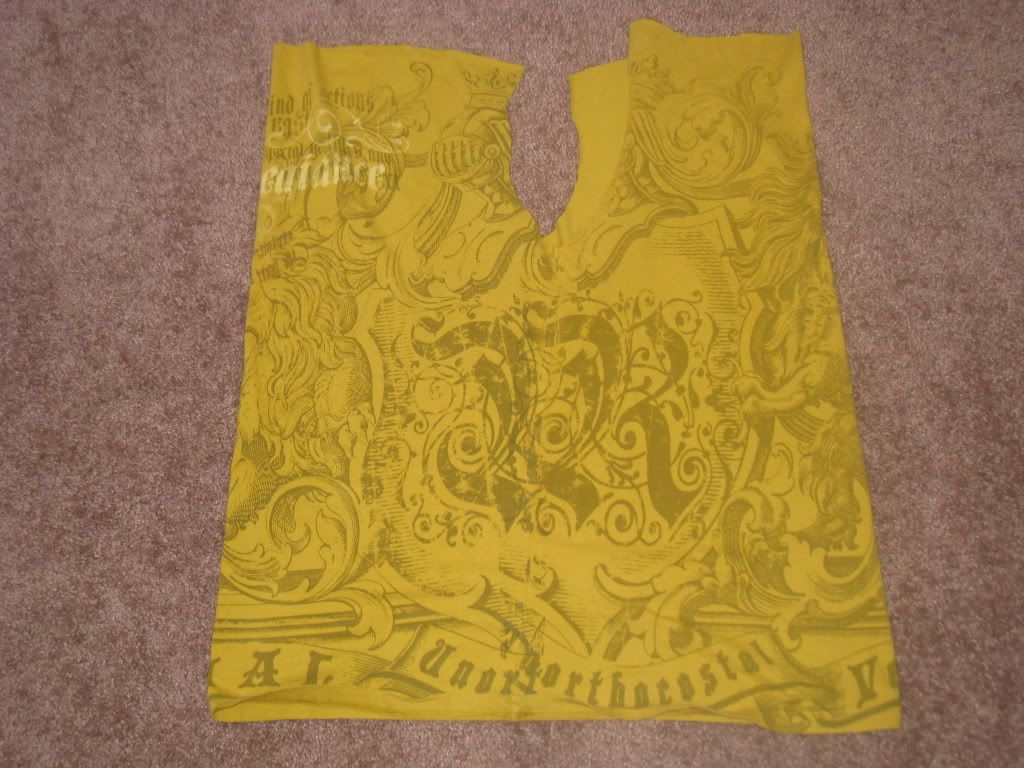
Step Two: Turn the Shirt to the side so that the sleeves are in front and the back. (instead of on each side)

Step Three: Cut a strip of fabric off of the neckline of the shirt and tie it to the two front corners so that you have a neckstrap
Step Four: Flip shirt over and cut strips in the back opening. I Cut about 4-5” long strips. Cut them longer if you are smaller and shorter if you are bigger. Then tie the strips together so it fits snug on your body.


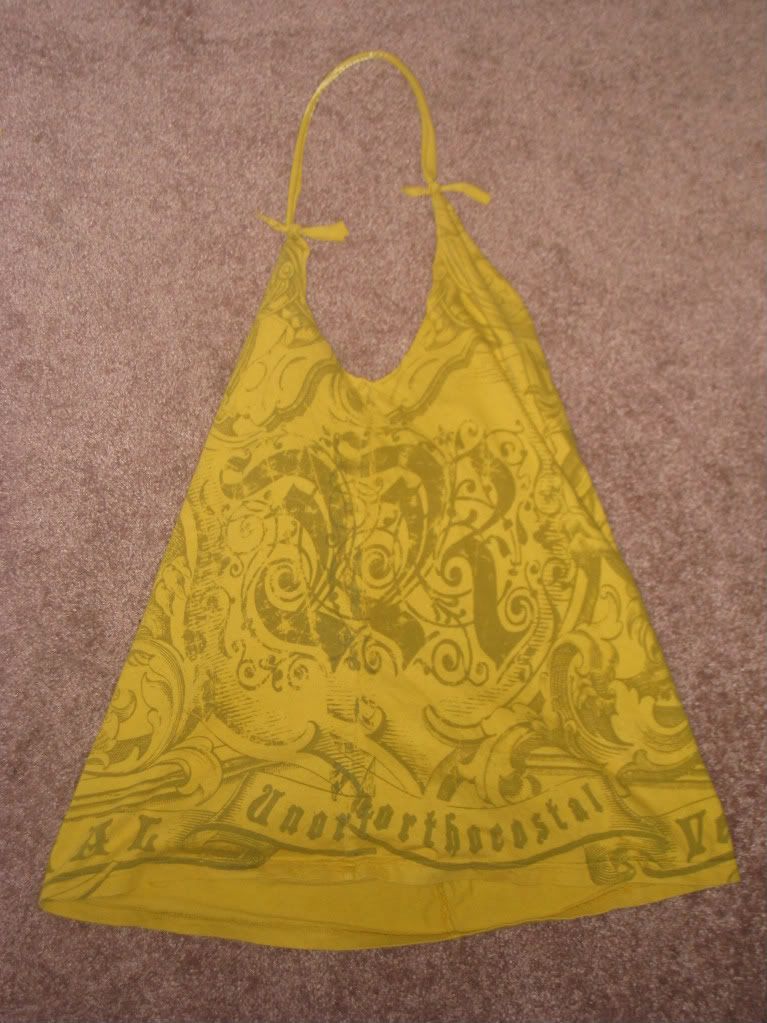
Last step is to put your new shirt on and adjust any ties bigger or smaller as needed. I even put a clip in the front to bunch it a little more in the front.


TA-DA!!
Here is another shirt I did that is the same style. I got this gray shirt from The Dollar Tree and then I did an iron on pattern with plastic bags! Here is the tutorial from “Filth Wizardry” on how to iron on plastic bag transfers.


Enjoy!
Monday, April 12, 2010
Under Construction
Hi Everyone!!
I’m excited to start Blogging and I don’t really know what to say! So my plan is to start typing and hope its good. :P I am new to the whole Blog thing. So feel free to comment on everything about everything. Im still working on getting everything set up and figured out so bare with me.
I’ll start off by introducing myself. My name is Ali and I am 21 and a Design Student at CalState Long Beach. I’m broke which is why I like inexpensive things that I can make fabulous. I’m a big fan of the Dollar Tree and I love thrift shopping. As you may have guessed, I called my blog ‘Found in the “Ali”’ Because my name is Ali and I like to find things for free…. In the Alley! :P And I’m a big dork and I thought it was really funny :D One thing I say a lot is “pshhh…I can make that”. So This is my blog about things I find and fix up, paint and transform, and see and copy. Hopefully you can get some ideas for your life or at least enjoy reading about me surviving my life on a “goodwill budget”.
<3 Ali
Subscribe to:
Posts (Atom)