Showing posts with label Fashion. Show all posts

Friday, January 21, 2011

Lace Back Tank

I got this doily from a thrift store for $1. I've had it for a while with the intent of doing this and I've finally got around to it.


You will need:
Lace or crochet doily (you can get these at the dollar tree!)
Tank top (on hand)
Sewing machine

 First: Lay the lace over the back of your tank top.
 Then: pin the lace to the tank top starting at the shoulders (or where ever it fits best) and trim off any odd parts. You can see I trimmed the top and bottom middle and also the sides of the bottom corners.
 Then sew the top by the shoulders and the bottom edges.


Sew everywhere there are red lines


Like this

Then flip the tank inside out and cut out the portion of the tank top where the lace overlaps the tank.

Then you are all done. I LOVE IT! I love mustard yellow and I love lace.

Total cost: $1


I'm linking up!! So check out my Link page and support all the lovely hostesses!

Saturday, October 16, 2010

A Brand new Sweater for 70cents!

Yes, thats right. I bought a brand new sweater for 70 cents. I got it off the clearance rack at Marshalls.

It had a little snag it it but I knew just the thing to cover it up.

 Its super easy and it took me about 5 minutes. First I layed out the ribbon in a squiggly pattern that I liked and that would cover the snag.
 Then I pinned it down and sewed down the center of the ribbon. All done!


Linking up to this party:
http://simplydesigning.blogspot.com/2010/12/link-party.html


Tuesday, July 27, 2010

Lace Ring

As I was thrift shopping I saw this cute little lace doily that was a little stained. I got it for just $1. I thought it would be perfect for this lace ring that "Stepping thru Crazy" made on her blog.


Keep Reading to see how it turned out!


Friday, July 16, 2010

Placemat purse


Check out this cute Purse I made out of a dollar tree place mat. It's super easy and only takes about 5 minutes!


You will need:
-sewing machine
-ribbon (on hand)
-handles ($2.50)
-placemat ($1.00)


ONE: Cut 4 pieces of ribbon around 3-4" depending on the thickness of your handles.

TWO: Pin the ribbon to one of the shorter sides of the placemat wrapping the handles in them. Make sure that the handle is centered on the placemat

THREE: Sew all the way across from one end to the other sewing the ribbon to the placemat. If you can sew over the existing hem it will look a little cleaner.
FOUR: Trim off excess ribbon.


FIVE: Repeat on the other side.


SIX: Fold in half and sew each side to create the pocket.
SEVEN: Fill it with stuff! Project total: $3.50

Monday, June 28, 2010

Ruffles and stuff

Ive seen so much of this ruffle all around "Blogland" so I thought that I would try it. It was super easy! Which surprised me a little. I used fabric on hand and a tank top I already had. The tank top actually had a stain from work so the ruffle was perfect to cover it up.

Here is a picture of me in my newest creation that I paired with a skirt that I got at TJmaxx on Clearance for $5. I just wanted to brag about my good deal :P

If I were to do this again I would:
-use fabric that doesn't unravel
-not be lazy and use the same color thread as the fabric :P
-do the first stitch off center, pull the 1 thread to ruffle, sew it to the shirt down the center of the ruffle, then pull out the first stitch so that you are left with 1 stitch down the middle instead of two mish-moshed together.


I Think it turned out so cute. I plan to make more :)

Monday, June 14, 2010

Fathers day Gift!

My dad is the HARDEST person to shop for. He has everything and wants nothing. Ive only been able to give him home made things or "coupons for a dinner date". So this year since I've been so crafty lately I thought I would craft him something. But Dad and Craft don't always go well together.. for my dad anyway.

Then I thought I would design him a personalized shirt! This cost me $1! If your sneaky you can even snag one of his own plain T-shirts and personalize it. Then its free :P
Read how to do this after the jump!!


Saturday, May 29, 2010

Headband Leftovers

I made a few headbands with some flowers and there were little leftover pieces from the backs since they came in a bunch. Can't let them go to waste now can we?? So I beautified them and made more headbands!


READ ON and ill show you how I did this....


Monday, May 24, 2010

Flower Pins

I saw this cute little idea originally on dollar store crafts.com but it was linked up to obsessively stitching's Blog. She has a great little tutorial and a bonus project too! *ooooh*

I bought a little bunch of flowers from the dollar tree and pulled them all apart. I used the petals from 2 flowers (there were 3 in each so I put 6 in mine) to make my one flower so it would be thicker and fluffier. Then I used part of the original centerpiece and buttons that I bought at the dollar tree a long time ago to create my new center. Finally I glued a hairclip to the back so now I can use it as a hair clip or I can also clip it to my tank top.


It cost me $1 for the bunch of flowers and $1 for 6 buttons. I was able to make 3 pins and I still had 5 buttons left over. So it cost me about 45 cents to make each one. Nice :) great for a gift or a little extra thing to clip to a card or gift card

Sunday, May 23, 2010

Fairy Princess Dress up: Part TWO!

So I got home from babysitting at 11:30pm and was excited to make a fairy princess skirt. So I did a little midnight crafting. :)

Read on to see how I made the skirt...

Saturday, May 22, 2010

Fairy Princess Dress up: Part One!

I saw these cute little wands at the dollar store when I bought some for my "garden stake labels". Tomorrow I'm going to a family friend's little girls birthday party. Im also face painting for all the kids (ps... if you live in the long beach, CA area and you need a face painter I'm your girl :P). Anyway I thought I would bring her a little gift even tho her mom insisted I didn't. So picked up the princess wand at the dollar tree. Here's a (really bad) picture of how it turned out:

read on to see how I did it.....

I'm also going to make a "$5 or less fairy-princess skirt" too so check back for how to do that!

Friday, May 7, 2010

T-shirt Tote-bag

My roommate has an old Bob Marley shirt that was her dad's. It has a few holes and it was over sized but she couldn't bare to let it go. So she let me turn it into a tote bag!

This is a great way to hold onto all those shirts with memories attached without wearing a sloppy T-shirt! READ ON to see how I did it.

Thursday, May 6, 2010

"Low-sew" Skirt for $1

I saw a size XXXXL shirt at the dollar tree and the first thing I thought was "4xl? wow thats 4 times more fabric for $1!" So picked it up and decided it would soon be a skirt. Read on to see how I made this easy "low-sew" skirt.


Tuesday, May 4, 2010

Vintage Headband

I saw this surprisingly cute hair tie at the Dollar tree. My hair is too short for a hair band so I decided to make a headband. I love headbands but they always hurt my head! So a ribbon headband is what I decided on.


Wednesday, April 14, 2010

No-Sew Halter Top


 I got this Men’s shirt from a thrift store by my house called “Thrift Redefined”  for $2.00. I love this color and i loved the pattern on it so I decided to make it into a halter top for me. Its really easy and it takes about 10 minutes.


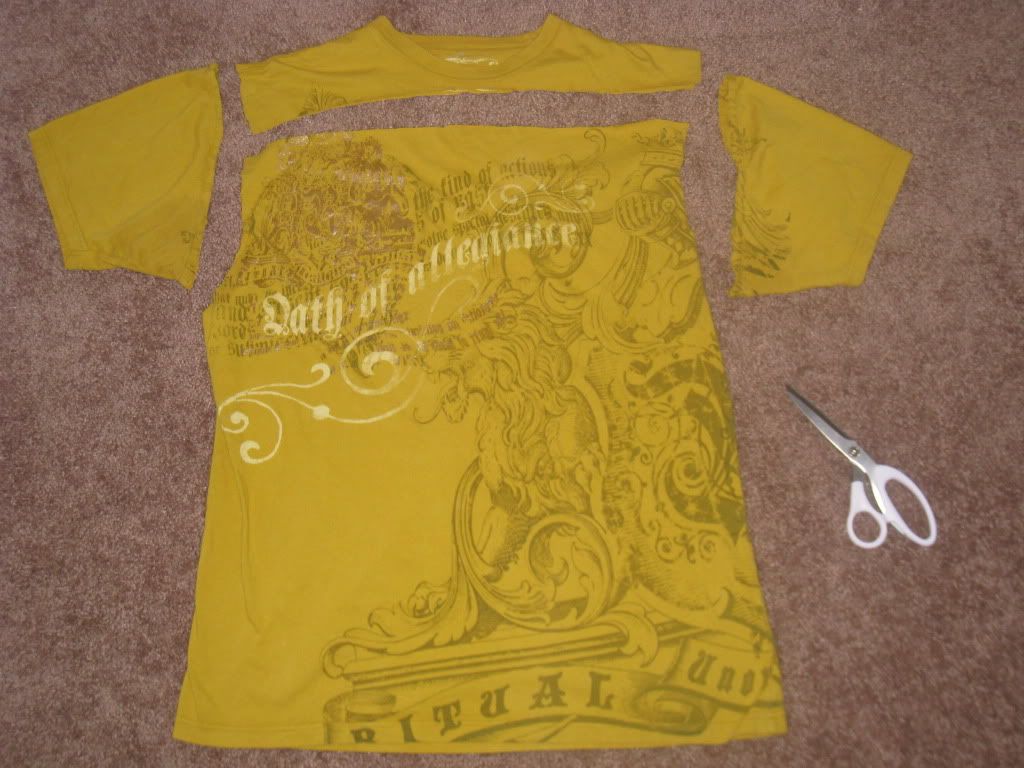
Step One: Find a men’s XL shirt and cut off the sleeves and the neck


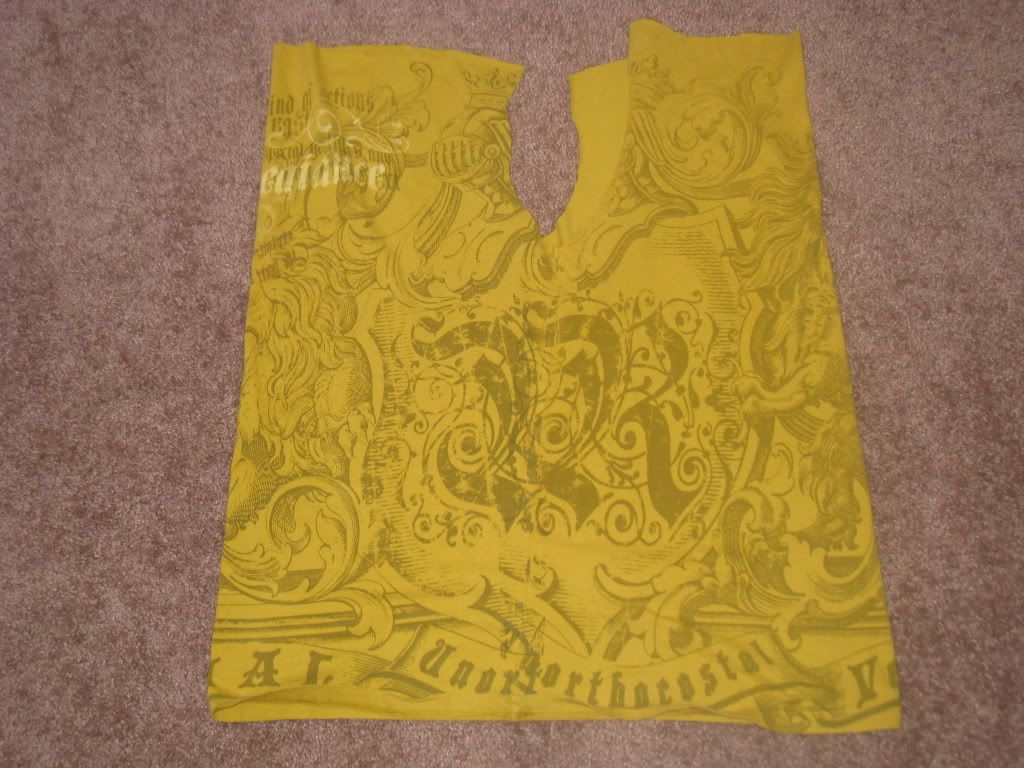
Step Two: Turn the Shirt to the side so that the sleeves are in front and the back. (instead of on each side)


 Step Three: Cut a strip of fabric off of the neckline of the shirt and tie it to the two front corners so that you have a neckstrap


Step Four: Flip shirt over and cut strips in the back opening. I Cut about 4-5” long strips. Cut them longer if you are smaller and shorter if you are bigger. Then tie the strips together so it fits snug on your body.


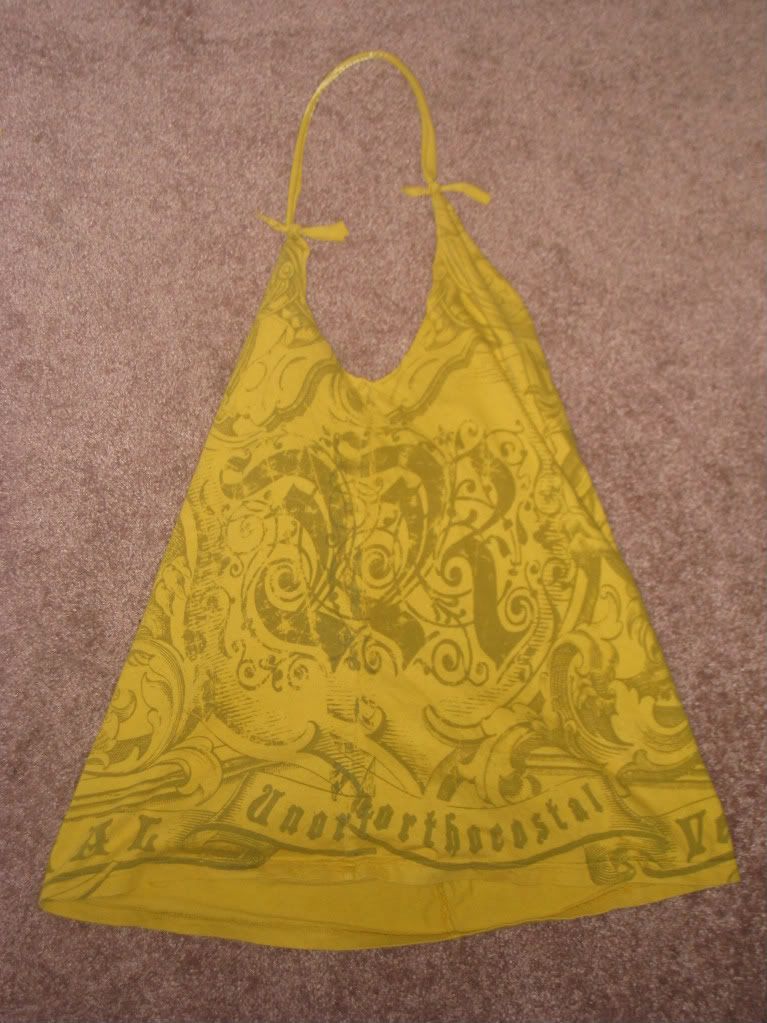
 Last step is to put your new shirt on and adjust any ties bigger or smaller as needed. I even put a clip in the front  to bunch it a little more in the front.


 TA-DA!!
Here is another shirt I did that is the same style. I got this gray shirt from The Dollar Tree and then I did an iron on pattern with plastic bags! Here is the tutorial from “Filth Wizardry”  on how to iron on plastic bag transfers.


 Enjoy!